Fly Fishing, Backcountry Fishing, Bottom Fishing, Destin Fishing, Dolphin Fishing, Drift Fishing, Flats Fishing, Grouper Fishing, Inshore Fishing, iOutdoors Blog, Islamorada Fishing, Key West Fishing, Kite Fishing, Lobster Catching, Marlin Fishing, Miami Beach Fishing, Offshore Fishing, Permit Fishing, Redfish Fishing, Sail Fishing, Shark Fishing, Snapper Fishing, Snook Fishing, Sport Fishing, Sword Fishing, Tarpon Fishing, Trout Fishing, Tuna Fishing, Wahoo fishing, Wreck Fishing
What hook should you use for which fish?
Wow! Old as man itself but it can really be overwhelming when you start to choose a hook. Freshwater, saltwater, bait hooks,“J” hook, circle hook or live bait hooks. Hook choice is VERY important! As a general rule I judge the hook size I need to use as a function of the bait size I am using, not the size of the fish I am targeting. The fish I am targeting determines the bait size. I particularly prefer circle hooks- they virtually hook themselves and are very fish friendly in catch and release situations. Experience is the best teacher on hook selection- use the right hook for the right fish and type of fishing you are doing and be prepared have a selection of hooks at hand. One common mistake is using a hook that is to big. Imagine this – if I hook you in the arm with a small quarter size hook are you going to be able to get a way or are you going to follow me anywhere? A sharp point and a strong hook is much more important than the size. Except in the case of top water lures please consider twice before you use a treble hook- there is virtually no opportunity for catch and release using a treble hook and they are banned in many areas. Treble hooks are dangerous to fisherman as well- use them sparingly and only when you plan to kill and eat the fish. One very important rule: Even though a new hook seems sharp out of the package always, always sharpen your hooks before you use them and re-sharpen them often.
Fish hooks come in several types. Knowing a few of the more popular ones and their uses can help you be successful.
Which hook should you use for which fish?
 O’SHAUGHNESSY This hook is named for the specific design of the hook. It’s a standard hook, forged with a very strong bend. This hook is relatively thick, very strong, and not likely to bend out of shape. Generally designed for saltwater, it is good for general bottom fishing use. Sizes range from #3 to as large as 19/0.
 ABERDEEN These hooks, while primarily used in smaller sizes in freshwater, are also used by saltwater anglers. They are generally made from shaped wire. Unlike the O’Shaughnessy, it can and does bend. It can be bent back into shape several times before it becomes too weak. However, once a fish is hook and the barb has completely penetrated, this hook holds quite well. These hooks are modified with bends in their shanks for use in jig molds.
 CIRCLE Perhaps the best innovation in hooks to come along, circle hooks promote healthy catch and release. The design of the hook itself, when used properly, prevents fish from being hooked in the gut. Many anglers have a problem using these hooks because they require no hook set. If you do try to set the hook, it will generally come out of the mouth of the fish. These hooks are designed to move to the corner of the fish’s mouth and set themselves as the fish swims away from you. Anglers feel a bite and simply begin reeling, slowly at first, then faster as the hook gets set.
 LIVE BAIT These hooks generally have a shorter shank than other hooks. Whether that is to allow the live bait to swim more freely or to be less apparent to the fish is debatable. My vote is to allow the bait to swim more freely. These hooks come in regular and circle designs. Regular live bait hooks will be swallowed and result in gut hooks most of the time. Circle live bait hooks provide a greater chance for a good release.
 KAHLE The curve on these hooks makes them ideal for live bait. Made from the same wire as the Aberdeen hooks, they will bend if hung on the bottom of some structure. However, once a fish is hooked, the design of the hook prevents it from being straightened.
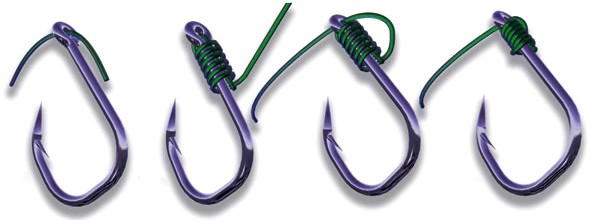
The Guide below provides an overview of the parts of a fishing hook. There are some common parts to all hooks. Those parts include the eye, shank, gap, point and barb. The variations on these characteristics result in dozens of hook styles.
Anatomy of a Hook
The Eye
The hook eye is the connection point to the fishing line or the body of lures. Ringed eyes are the most common. The metal is bent in a uniform loop and the end sits flush against the shank. Needle, looped and tapered are some other types of hook eyes, but they tend to be used for specific applications, like saltwater or dry flies.
The Shank
The shank is the length of the hook from the eye to where the bend starts. Shanks come in short, medium or long lengths. Short ones greatly reduce the size of the hook. Medium length shanks are the most common and used in an array of fishing situations. Long shanks can be used for live bait fishing where finesse isn’t critical, or to match a longer profile of an artificial bait.
The Gap
The gap is the size of the bend in a hook from the shank to its point. An average size gap will do in most situations, but sometimes a wide gap is needed. A wide gap is used for rigging thick-bodied baits to ensure that the hook point will be exposed on the hook set.
The Point
This is the tapered end of the hook. As its name suggests, it’s the sharp point that penetrates a fish’s mouth. The shape of the point will vary. Needle, knife edge, spear, or rolled ones are some examples. The most important thing, however, is that you keep your points sharp, so invest in a hook file and use it often. Quality hooks are packaged extremely sharp and will stay sharp longer than cheaper ones.
The Barb
The barb is designed to hold the hook in place once it penetrates the fish’s mouth. The larger the barb, the more difficult it is for the fish (and likely yourself) to get the hook free. Many catch and release anglers pinch barbs with pliers or file them down for easy hook removal.
Other Basic Hooks
 BAIT HOOKS come in a variety of styles. Most feature barbs on the shaft to hold bait in place. Longer shank hooks are good for teaching kids to fish, while shorter shank ones are often used in snells.
 TREBLE HOOKS feature three bends and points in one hook. Trebles provide more hooking potential to many artificial baits such as crankbaits, jerkbaits or topwaters. Bait anglers also use trebles. Cut bait for catfish or threading minnows for lake trout are two examples where trebles are regularly used.
 SIWASH HOOKS are quite strong and have a long shank and point. These hooks have a straight eye so they sit properly on lures. Siwash hooks are often used on single-hook baits, such as spinnerbaits. I also use them sometimes to replace factory-provided treble hooks on certain baits, especially spoons.

JIG HOOKS are designed to sit in specific jig molds. They feature a bend just below the hook eye, with a 90-degree bend being the most common. Pouring your own jigs can save you money and be a fun winter hobby to gear up for the next season
![Jelly Fish are NOT Your Friends]()
iOutdoors Blog, Lobster Catching, Surfing
JellyFish are NOT Your Friends

Jellyfish are free-swimming species that are often associated with painful stings. However, not all jellyfish species have stings that are painful or harmful to humans. Still, those that do sting humans have earned this creature a negative reputation, in general. Anyway, if you are stung by a jellyfish, it is bound to be painful and can cause red welts to break out from your skin. The following are some tips on what to do if you get stung by a jellyfish.
- Get out of the water. The sting of some jellyfish species can be so powerful and painful that it can impair you from swimming or floating – this can cause drowning. Once out of the water, use salt water to rinse the affected area.
- Get rid of the tentacles. The tentacles continue to sting anything it is in contact with. Thus, ensure that you remove them immediately – do not use your bare hands, use a towel, gloves, tweezers, seaweeds, or anything available.
- Rinse it with vinegar. Vinegar helps deactivate the remaining nematocysts that hold the venom and can also soothe the affected area. Pour a liberal amount unto the affected areas. If vinegar is not immediately available, human urine can also do the job. You can also place baking powder, flour, cornstarch, or meat tenderizer on the area to help alleviate the pain and to keep it dry.
- Use topical anesthetics. If the sting persists, you can use topical anesthetics such as hydrocortisone. Ammonia is also a good option. If the sting hurts a lot, drink pain killers.
Those who show signs of an allergic reaction or have been stung really badly must be taken to a medical facility as soon as possible.

iOutdoors Blog, Lobster Catching, Water Sports
Scuba the Keys
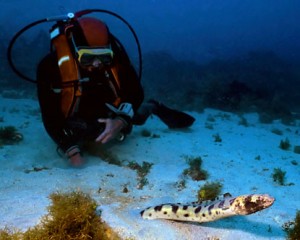
When in Florida, an activity that should never be missed is to dive at the Florida Keys. The Florida Keys is a beautiful underwater paradise, and where the longest living reef in the western hemisphere can be found. Scuba divers need not worry about seeing the same kinds of coral or the same kinds of fish for in the Florida Keys, the coral reef is endless, fish vary in size and color, and there are over 500 wrecks to explore. All these combined can guarantee anyone who scuba dives in Florida Keys to be left awestruck.
Different Dive Sites in the Keys
There are many different dive sites in the keys. These include the Key Largo dive sites, the Islamorada dive sites, the Marathon dive sites, and the Lower Keys dive sites. Most scuba diving charters in the Keys offer dive charters in these different sites. However, the choice of diving sites will depend on the skill level and interest of the scuba diving visitor.
Preparing to Scuba Dive
There are some, rather, quite a lot of preparations to do before a scuba diving activity in the Keys. First of all, the scuba diving charter will have to check ocean weather conditions for the safety of both the staff and the visitors. These conditions would include meteorological data such as temperature, dew point, sea level pressure, and pressure tendency. Wind data and oceanographic data such as sea surface temperature, wave height, and wave period must also be checked prior to a dive.
The equipments needed for scuba diving can be provided by the scuba diving charter. However, there are numerous shops and rentals for scuba diving equipment in the Florida Keys. The charter and the scuba diving instructors must possess a certification card which is required to dive. The needed dive equipment would include BC, alternate air source, air gauge, and bottom timer or watch.
Enjoy!
Scuba diving in Florida Keys is certainly worth it because the reef offers crystal clear waters with visibility of up to 120 feet. It can be done either at night, both of which are always guided by a scuba diving instructor. Aside from viewing the coral reef, an increasingly popular diving activity in the Keys is wreck diving. There are many wrecks available in Keys including Spanish galleons and Civil War wrecks. For those who just can’t seem to get enough of scuba diving in the Keys, there is even an underwater hotel where divers can stay, the first of its kind in the world.
![Jelly Fish are NOT Your Friends]()
Bass Fishing, Bottom Fishing, Charter Head Boat, Fly Fishing, Grouper Fishing, iOutdoors Blog, Kite Fishing, Lobster Catching, Marlin Fishing, Offshore Fishing, Sail Fishing, Shark Fishing, Sword Fishing, Tuna Fishing
Ridin’ the Waves in Florida
Florida boasts of having over 8,000 miles of coastline as well as 4,500 miles of inland waterways. With this much water for cruising, it is no wonder that boating is such a popular sport in the state. Many boaters often find themselves cruising over Florida waters and its waterways for the sheer beauty of it. Many types of boats have graced the waters of Florida ranging from mega-yachts to wooden skiffs. In Florida, owning a boat is as normal as owning a car.
Florida Waterways
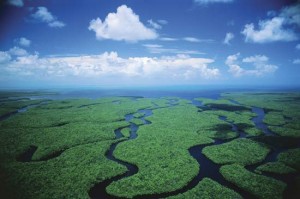
The wonders of boating in Florida are further enhanced with its waterways, passages where boats can pass through for maximum boating experience. There are many waterways maintained by the Florida Inland Navigation District, the two most common and popular are the Intracoastal Waterway or ICW and the Okeechobee Waterway.
The ICW is also known as “the ditch” and is a natural but dredged channel. This channel extends 500 miles down the east coast of Florida to the tip of the Keys. This is a very popular boating route because it runs through rivers, creeks as well-dredged canals, giving boaters an extremely great variety in boating experience.
The Okeechobee Waterway, on the other hand, is composed of 135 miles of boating route. Extremely popular during the summer, this waterway runs along the St. Lucie Canal from Stuart, across the lake, then on to Sanibel Island via the Caloosahatchee River.
Best Places to Anchor Out
Just as cars park in a parking lot, boats do so as well but in ports. Boats aren’t just anchored anywhere. There are many great places to anchor in Miami including across Baker’s Haulover Inlet in front of Florida International University; in front of Watson Island; the anchorage in Boca Chica Harbor; and the bayside by Sand’s Cut. Palm Beach County also has a great place to anchor such as Peanut Island across Lake Worth Inlet.
Boating Rules and Regulations
It is recommended that before purchasing a boat or even before boating in Florida, especially for those new in the area, to get acquainted with the state’s boating rules and regulations for a safe and legal boating experience.
iOutdoors Blog, Lobster Catching
Storing Lobster
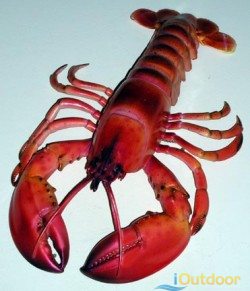
Not all lobsters that are caught go directly to a steamer or pot. When you buy a lobster, you should keep in mind the basic steps when keeping a lobster in storage. To properly do this, here are some steps to properly preserving lobsters until they are brought out to be cooked.
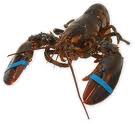 First off, do not keep the lobster exposed too long without storing it. Ideally, lobsters need to be cooked as soon as they reach the kitchen, but they can live for at most 2 days, provided that they are stored and cared for properly. Then again, the lobster will not stay fresh long, and if the lobster is not exactly freshly caught when purchased, chances are that it will not last 2 days in storage.
If you are planning to buy a freshly caught lobster, the best place to visit is the fish market. There, you can find dealers who regularly receive fresh seafood such as fish, shrimps, crabs, lobsters and others. Buyers should avoid purchasing seafood items in supermarkets as most of the seafood products featured in supermarkets have often stayed long in shelves and have gone past their prime.
Now that you have your lobster, make sure that you do not drown it. Sure, it does survive in water, but contrary to common beliefs, you should not cover a lobster totally with water as this could suffocate it. Instead, keep the lobster’s gills regularly moistened, pack it into a container filled with damp seaweed or newspaper. You can also store it in a brown paper bag that has breathable holes. Keep away from plastic bags though, as this has the same suffocating effect as drowning your lobster.
Lastly, ensure that your lobster stays kicking long enough for it to be cooked by keeping it in a cold and controlled environment. Once you have done al of these things, you have now successfully learned how to store a lobster.

iOutdoors Blog, Lobster Catching
Lobster Anyone
When attempting to cook a lobster at home, it is important to remember that five-star restaurants do not achieve praise for their lobsters by merely throwing the lobster into a pot of boiling water. To properly cook a lobster at home, here are some basic steps you need to do.
Before anything else, gather the materials that you need for cooking. The pots, pans, cutlery, roasting rack, food tongs, tray, etc., are just some of the utensils that you will be using. You should also prepare the needed spices that would make your lobster tasty, such as garlic, bell pepper, onions, bay leaves, salt, and perhaps some mayonnaise. These ingredients will vary depending on the recipe you are following.
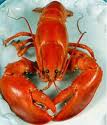 The first step in cooking the lobster is to secure a pan that is deep enough to hold approximately 6 liters of salted water. Make sure that all your ingredients are within easy reach. Place the roasting rack at the bottom of the pan, which will ensure that the lobster stays out of the hottest area of the pan.
Here comes the tricky part of the process: putting the lobster into the pan. Although tricky, once you have successfully done it, mix in the prepared spices and seasoning. By doing so, you are gradually increasing the temperature of the lobster together, not exactly blanching or shocking the lobster by throwing it into a pot of boiling water. As soon as the lobster is cooked, it is then time to clean its innards.
The lobster is now cooked and seasoned to taste. You can add some mayonnaise to make it tastier, or garnish it for a truly delectable-looking dish.

 O’SHAUGHNESSY This hook is named for the specific design of the hook. It’s a standard hook, forged with a very strong bend. This hook is relatively thick, very strong, and not likely to bend out of shape. Generally designed for saltwater, it is good for general bottom fishing use. Sizes range from #3 to as large as 19/0.
 ABERDEEN These hooks, while primarily used in smaller sizes in freshwater, are also used by saltwater anglers. They are generally made from shaped wire. Unlike the O’Shaughnessy, it can and does bend. It can be bent back into shape several times before it becomes too weak. However, once a fish is hook and the barb has completely penetrated, this hook holds quite well. These hooks are modified with bends in their shanks for use in jig molds.
 CIRCLE Perhaps the best innovation in hooks to come along, circle hooks promote healthy catch and release. The design of the hook itself, when used properly, prevents fish from being hooked in the gut. Many anglers have a problem using these hooks because they require no hook set. If you do try to set the hook, it will generally come out of the mouth of the fish. These hooks are designed to move to the corner of the fish’s mouth and set themselves as the fish swims away from you. Anglers feel a bite and simply begin reeling, slowly at first, then faster as the hook gets set.
 LIVE BAIT These hooks generally have a shorter shank than other hooks. Whether that is to allow the live bait to swim more freely or to be less apparent to the fish is debatable. My vote is to allow the bait to swim more freely. These hooks come in regular and circle designs. Regular live bait hooks will be swallowed and result in gut hooks most of the time. Circle live bait hooks provide a greater chance for a good release.
 KAHLE The curve on these hooks makes them ideal for live bait. Made from the same wire as the Aberdeen hooks, they will bend if hung on the bottom of some structure. However, once a fish is hooked, the design of the hook prevents it from being straightened.
 Long shanks can be used for live bait fishing where finesse isn’t critical, or to match a longer profile of an artificial bait.
 BAIT HOOKS come in a variety of styles. Most feature barbs on the shaft to hold bait in place. Longer shank hooks are good for teaching kids to fish, while shorter shank ones are often used in snells.
 TREBLE HOOKS feature three bends and points in one hook. Trebles provide more hooking potential to many artificial baits such as crankbaits, jerkbaits or topwaters. Bait anglers also use trebles. Cut bait for catfish or threading minnows for lake trout are two examples where trebles are regularly used.
 SIWASH HOOKS are quite strong and have a long shank and point. These hooks have a straight eye so they sit properly on lures. Siwash hooks are often used on single-hook baits, such as spinnerbaits. I also use them sometimes to replace factory-provided treble hooks on certain baits, especially spoons.